Professional Makeup Artist | Organic Chemist | Educator

Tuesday, 8 December 2015

BH Cosmetics Wild Eyeshadow Palettes - Review & Swatches


Hello makeup junkies! Today we will be talking about baked eye shadows from the BH Cosmetics Wild series. It featured three nine-shade all baked shimmer eye shadow palettes, two of which I currently own: Wild Child and Wild & Free. The great thing about baked shadows is that they have a sophisticated shine, which is not over the top, and may be used wet or dry.

Product Claims

Build lustrous and exotic eye looks with this palette of nine totally gorgeous, baked eyeshadows. Whether you want to go neutral, bold or add a pop color-- you’re sure to find a shade to fit your mood. Featuring highly-pigmented, wet-to-dry shadows with a lightweight feel that delivers fierce color impact to satisfy your desire to be absolutely wild!


What Do I Think?

The Wild palettes come in light weight, travel-friendly, square cardboard packaging with a mirror incased on one side covered by a transparent plastic sheet and magnetic closure. They both showcase different themes so their designs vary too. Wild Child is based on neutrals with some corals and purples thrown in for good measure. It has a leopard print packaging with hints of pink. Wild & Free has tiger stripes running down its cover in black and teal and Aztec yellow around the mirror. It contains earthy greens and browns with splashes of blues and purples.

First let us look at Wild Child. If you love shimmers and prefer staying on the safe side with neutrals then this is for you. It has a creamy white, deep violet, mauve, golden brown, bright coral, antique gold, deep chocolate brown, pale coral and a light rosy brown. All these work wonderfully on the lid and the lighter colours serve to brighten up the inner corners. The texture is soft and creamy with minimal fall out using the right brush and technique. As you may notice from the swatches the lovely baked appearance dulls down the colour you actually see in the pan so it is appropriate for daytime as well.

I was very excited about Wild & Free but was disappointed by the shades I was anticipating the most. It contains a Nutella-brown, intense blue, pale frosty blue, light green with gold shimmer, vibrant copper, forest green, bright purple, sea green and a pale gold. The pale frosty blue, intense blue and bright purple had quite poor texture with loads of fallout and low pigmentation. You can make them work by using a pencil/cream base or a matte shadow underneath of a similar colour. A fixing spray like MAC Fix plus or the Stageline one could help solve some issues too. The rest of the shades presented no such problems and glided on smoothly.

The swatches were taken dry over a drugstore eye primer. I highly suggest using a good eye primer and matte eye shadow in a similar or nude colour underneath all the shades to increase longevity. They cannot withstand oily lids on their own if you are getting dolled up for an event. They start creasing after 5-6 hours even with an eye primer if you have oily eyelids or a habit of applying moisturizer on your eye lids like me.

If you can grab these at retail or sale price then it is a good bargain. However, if you plan to pre-order them or get from a Facebook page’s instock items, they may cost around PKR 1500 each. Since the quality is inconsistent and I have not yet tried the third one: Wild at Heart, I don’t recommend Wild & Free to regular folks. Unless you are an eye palette hoarder like me and don’t mind spending a few extra bucks or effort in making some shadows work, steer clear. Wild Child is the one I would recommend because I have no complaints about its quality and I adore the shade range.


Price

PKR 1500

Availability

BH Cosmetics official website

Pros

Good texture
Minimal fallout
Good shade range
Attractive packaging
Travel friendly
Use wet or dry
Affordable

Cons

Some problematic shades

My Rating

Wild Child 4/5
Wild & Free 3/5

Have you tried any of the BH Wild baked eye shadow palettes?

Love,
Sadaf


Disclaimer: This is a personal blog edited by its owners and the opinions expressed here belong solely to its owner's. For questions and queries please email at thepoutpainter@gmail.com
Read More

Tuesday, 24 November 2015

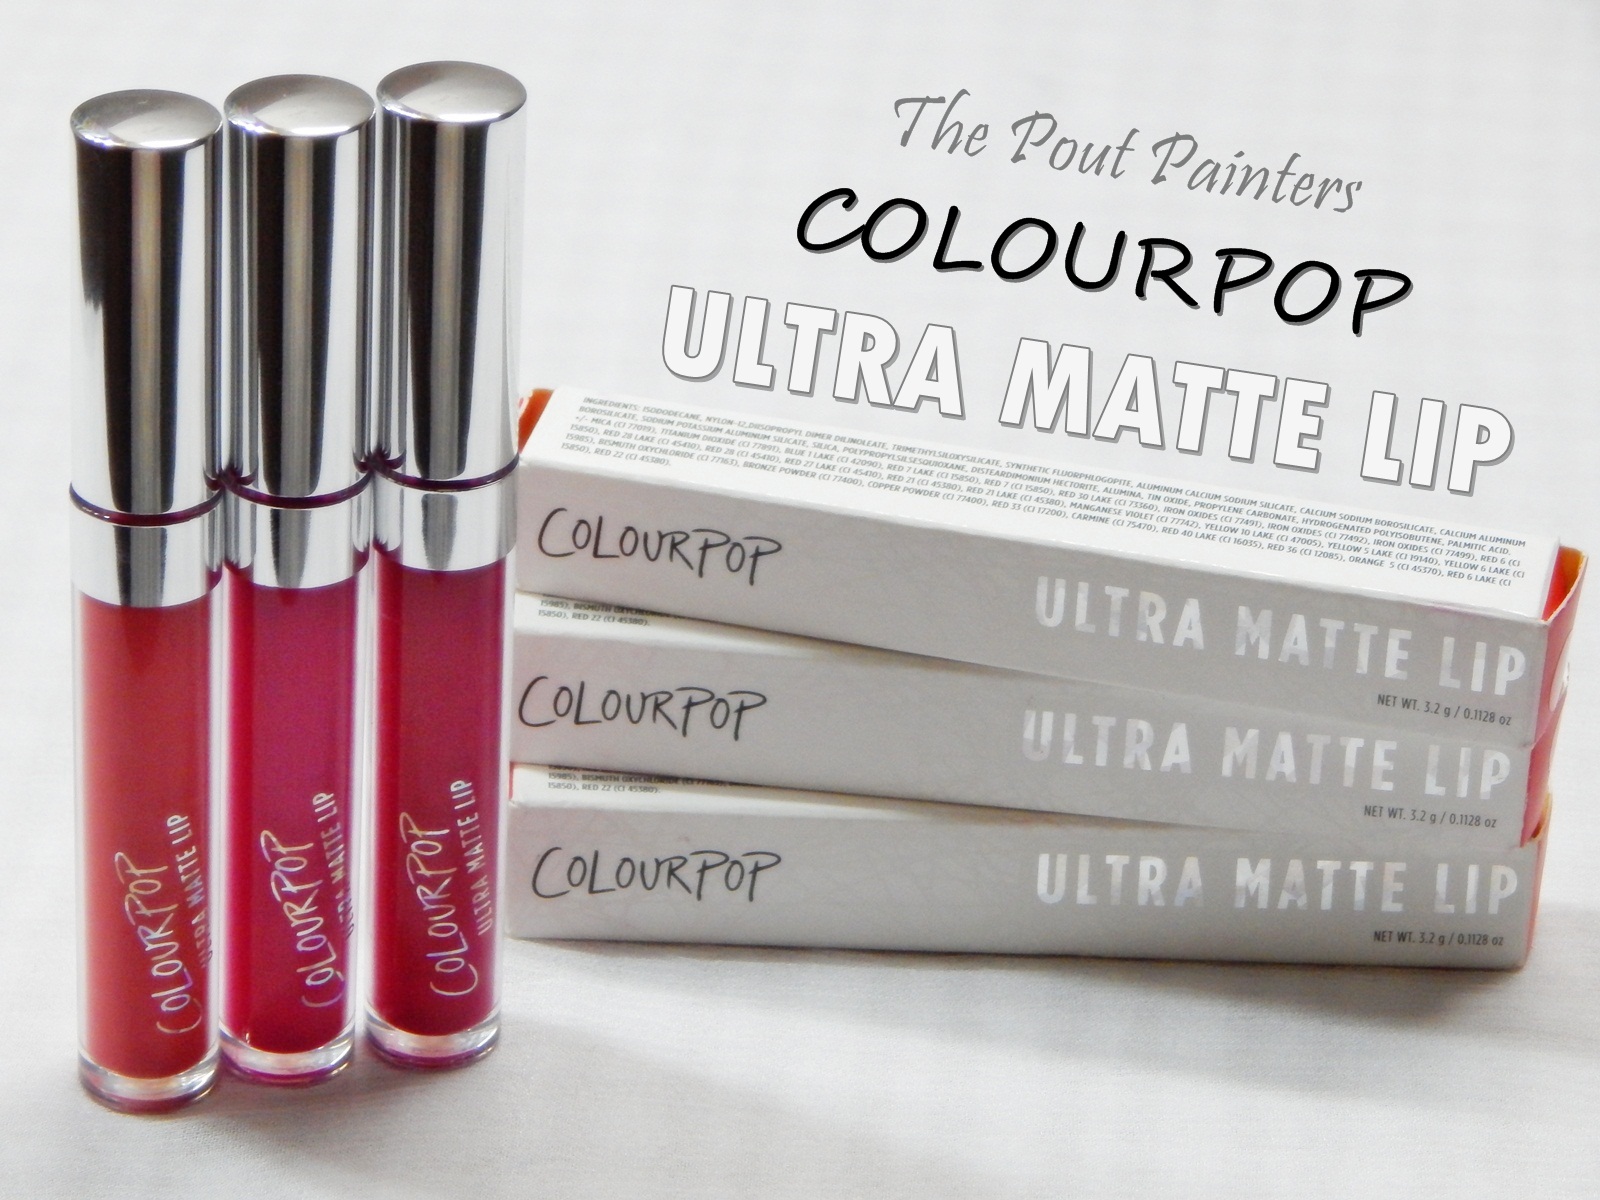
ColourPop Ultra Matte Lip– Review and Swatches


Our love affair with liquid lipsticks continues...

They came, they saw, they conquered. This is true for ColourPop. Their products, especially the liquid lipsticks, are all the hype these days! We were so excited to try them out when we received our first ColourPop package. I, for one, am a huge fan of bold lips. To be honest, flushed cheeks, a highlighter and a bright lip is all that I ask for. Although my stash is full of similar bright hued lipsticks, I chose to go for some eye-catching colours from ColourPop Ultra Matte Lip range yet again.


Product Claims

The thin and lightweight formula glides onto the lips smoothly and leaves super intense pigment-rich colour with a bold, ultra matte look. It's very long wearing and completely kiss-proof!

What Do I Think?

The packaging consists of a simple but good quality plastic tube that comes enclosed within a white box. These have thinnest formula among the ones I have tried up till now. The others have a creamy consistency, which takes a bit longer to dry and set. This isn’t the case with ColourPop liquid lipsticks. Since the formula is quite thin, these dry within a few seconds so you need to be very quick at application. The pigmentation and staying power is the best I have seen until now in any liquid lipstick I have used. These stay put on your lips for 7 hours straight before they begin to chip off. Completely water-proof (haven’t checked the kiss-proof claim though :-D). Sadaf has kissed her stuff toys while wearing it and supports this claim. You have heard it all before, right? On the downside, these are quite tricky to apply especially if it’s the first time you are using any liquid lipstick.


Here are a few tips that will help you get the smoothest and most flawless application with ColourPop liquid lipsticks.
  • The formula of these lipsticks isn’t best friends with flaky lips. Therefore, scrubbing your lips really helps it go on smoothly.
  • When I first applied these I felt my lips withered under the product when it dried! (Yes, that’s the effect an ultra-matte lipstick has). It wasn’t the most comfortable experience. I realized later where I was going wrong. Applying these on dry lips won’t leave you comfortable with the product so make sure your lips are hydrated.
  • Line your lips first. Unless your hands can move with the amazing speed of The Flash, I would not suggest skipping lip liner. Lining your lips directly with the product’s applicator may require you to go over and over again on your lips which will only create a mess.
  • You get a blob of the product on the applicator when you take it out of the tube. Instead of removing the excess, stretch your lips very slightly. Then apply that blob starting in the middle and spread it evenly over your lips. Do this twice, once for the upper lip and once for the lower. Let it dry and do not press the lips together until the product has dried completely.
  • Do not layer it up because you don’t need to. One swipe and that's all you need to get opaque coverage. I tried layering it up but it did nothing except ruin the intact layer beneath.


Ouiji: Neon coral. The perfect summer coral.

Highball: Hot pink. A universal blue-hued bright pink.

Mars: Bright fuchsia. A shade that anybody can rock.

Price

$6.00 USD

Availability

ColourPop’s Official Website. We got ours from the Facebook store Indelath.

Pros

Thin and lightweight formula
Dries matte within a few seconds
Ah-mazing pigmentation!
Opaque coverage in a single swipe
Transfer-proof
Water-proof
Long Lasting
Kiss-proof

Cons

Drying
Tricky to work with

My Rating

4.5/5

Have you tried these? Yay or Nay?

Love,
Fizzah and Sadaf

Disclaimer: This is a personal blog edited by its owners and the opinions expressed here belong solely to its owner's. For questions and queries please email at thepoutpainter@gmail.com
Read More

Tuesday, 20 October 2015

Soft Smokey Fall Look - Step by Step Tutorial

Hey guys! Since fall is officially here, we have all transitioned to appropriate shades for this season. Fall / winter in Pakistan means wedding season so, I thought I would share my all time favourite technique for soft but sultry eyes for any event which you can pair with a deep lip and glowing cheeks.

The Eyes

Step 1
Do your brows and prime your eyes. I used the Essence colour and shape brow gel and I <3 stage eye primer.

Step 2
For the eyes I used my Makeup Revolution I <3 Makeup Naked Chocolate palette and my BH Cosmetics 120 colour palette 5th edition. Blend in a medium mauve-brown colour (Milky) in your crease with a fluffy eye blending brush like the Morphe MB23.

Step 3
Deepen the outer half of the crease with a dark burgundy or plum shade (Choc-fest) with the same brush and blend it out.

Step 4
Use a black pencil like the Essence I <3 stage smokey eye pencil and a smudge brush like the Morphe M213 to create blended smokey eyeliner close to your lash line. Tightline your upper lash line directly with that pencil or use a flat definer brush like the ELF Flat eyeliner brush.

Step 5
Apply a shimmery rose pink (BH Cosmetics 120 colour palette 5th edition) to your entire lid with a flat shading brush like the Sigma E55.

Step 6
Use a deep chocolate brown (White) to further deepen the outer crease with a tapered blending brush like the Sigma E45.

Step 7
Highlight your inner corner and brow bone with a cream matte shade (Smoothy) using a small dense shader like the Sigma E57.

Step 8
Define your lower lash line with that same deep chocolate brown (White) from Step 6 using a pencil brush like the Sigma E30S and merge it with the outer crease.

Step 9
Apply your favourite lengthening mascara like the Catrice Lashes to Kill Volume mascara and false lashes if you prefer.


The Face

Step 10
After moisturizing your face and getting rid of any eye shadow fallout, apply your foundation or BB cream. I used the Garnier BB cream for combination to oily skin in the shade Light with my Real Techniques Expert Face brush. This is the part where you shape your eyes. I like to follow my lower lash line in this regard. You may apply concealer/corrector above or below this layer depending on your preference.

Step 11
The lips are the focal point of this look and we have colour in the eyes as well so I wanted fresh glowing cheeks. I used the cream blush Macaroon from the Sleek Blush by 3 in Pink Lemonade. It is a soft natural pink that must be concentrated on the apples of your cheeks. It gives that lit from within glow so I skipped highlighter and face powder or fixing spray. You may use your fingers but I prefer my Real Techniques Expert Face brush.

Step 12
For soft sculpting I used Makeup Revolution Ultra bronze as a contouring shade with an angled blush brush from BH Cosmetics Wild Purple brush set.


The Lips

Step 13
Fill in your lips with a vampy lip liner like Makeup Revolution in Rebel. Top it off with a pretty plum gloss like Golden rose Ultra brilliant lip gloss in 31 to soften it up.

You are all done!


I hope you enjoyed this tutorial and found it helpful. Please let me know what you think the comments below and if you have any questions about it.

Share your idea of a Go-to Fall look in the comments below

Love,
Sadaf


Note: This post contains affiliate link(s) for which we get a commission if you purchase through them. If you want to support us and our blog feel free to click on them.

Disclaimer: This is a personal blog edited by its owners and the opinions expressed here belong solely to its owner's. For questions and queries please email at thepoutpainter@gmail.com
Read More

Friday, 2 October 2015

How to Get that Summer Glow in Winter?

Winter has its perks like every other season but one thing we miss the most about summer is healthy glowing skin. So what if the cold months are dark and dreary?  Light up your complexion with these easy beauty tips that will keep you looking fresh even when the mercury drops.


1. Stay Hydrated

While you may not feel so thirsty, it is important to drink plenty of water during the colder months as well. I learned this the hard way by suffering dehydration one winter. So now it has turned into a daily habit. Believe me it does make a difference! You may not see it quickly but you will definitely notice it in time.


2. Get your blood pumping through exercise

In order to keep the body’s vital organs warm, our muscles contract in the cold resulting in the contraction of blood vessels. This may sound weird but less blood flow to skin cells in cooler days ultimately results in dull and pale looking skin (since it is actually the blood that provides our skin with nutrients). To cope with that, do a little exercise (if you are not a regular gym person) and get the blood flowing. This is one ultimate tip to keep your skin healthy and glowing in winters even when you think you will freeze to death. :-D


3. Milk Cleansing

Nothing works better for cleansing skin than a cotton ball dipped in milk. I discovered this while I was still in college. Maintaining a skin care routine after spending the entire day out of the house was not a pleasant idea to me. Keeping up with being a lazy butt, I ended up cleansing my skin with milk every night. Even my favourite milk cleanser failed in front of that. Soaking a cotton ball in milk, squeezing out the excess and moving it all over face, neck and hands (even feet) in circular motions for 5 – 10 minutes works like magic. You will even feel your skin softened and tightened afterwards, yeah that’s because milk has protein in it, remember? :-D


4. Exfoliation

While cleansing does half of the work, exfoliating once or twice a week is important as well. Getting rid of the dead skin cells’ layer will reveal the robust skin cells buried beneath it. This will definitely bring out the glow hiding under all that.


5. Moisturization

While chilly winds require you moisturize your skin to protect it from harsh weather conditions, you should not skip it even in summers. Moreover, make sure you use a separate SPF cream if your moisturizer does not contain it already. There are different ones for various skin types so pick one that suits you best.


6. Fake it! Bronze and highlight

Since we all love makeup, it wouldn’t hurt to fake some summery glow when the sun decides not to shine upon us, right? Use your favourite bronzer to get that sun-kissed glow. We recommend MUR Ultra Bronze (it’s that matte bronzer that everyone can easily fall in love with) and add a bit of a champagne highlighter such as ELF Moonlight Pearls, Sleek contouring kit, MUR Golden Lights or NARS Albatross for that extra glow. You can skip the highlighter if you wish to use a shimmer bronzer like one from Wet n Wild or Urban Decay.


7. Flushed cheeks

As the blood vessels near the surface shrink making us pale during the winter time, you can easily fake a healthy flush with the magic of makeup. We recommend a cream or liquid blush as it will last longer, leave a stain and give you that lit from within glow. It is especially suitable for mature skin that is more prone to dryness. There are some excellent options such as Chanel, ELF, Makeup Revolution, NYX, etc.


8. Detoxify your body

It is essential that you take time to flush out harmful toxins from your body. You can make up a powerful blend of antioxidant fruits and vegetables anytime. It is best to take it regularly as there are often free radicals produced in the body that must be neutralized. They really help your metabolism and keep you feeling and looking great all the time.


9. Eat Healthy

Since we won’t be going into hibernation in the winter, your body needs that extra boost of energy as a lot of it is expended to maintain body temperature. Super foods like dark green leafy vegetables, whole grains and nuts are rich in vitamins, minerals and special compounds that can do wonders for your health.

We want to share one of our favourite winter recipes, which is healthy, wholesome and can be enjoyed by everyone. Walnuts are full of omega 3 fatty acids, fibre and contain zero cholesterol.


Recipe for Walnut Chocolate Brown Sugar Cupcakes (Serves 6)


Ingredients

Melted unsalted butter/ Desi Ghee-1/4 cup
Unprocessed brown sugar (Gurr)-1/4 cup
Whole eggs- 2
Flour- 1 cup
Baking powder-1 tsp
Baking soda-1 pinch
Cocoa powder- 2 to 3 tbsp
Vanilla essence-2 drops
Milk at room temperature- For perfecting consistency
Oil- For brushing on tray
Chopped walnuts-A handful or to taste


Method

1. Pre-heat electric oven at 160°C at least 20 minutes before use
2. Take a clean bowl and mix the melted desi ghee and gurr together
3. Whisk the eggs into this mixture and then add the vanilla essence to it
4. In a separate bowl, add the dry ingredients namely the flour, baking powder, baking soda and cocoa powder
5. Now pour the liquid egg mixture into the bowl of dry ingredients and mix thoroughly
6. You will notice the mixture is too thick so keep adding a bit of milk until you achieve a glossy batter of medium consistency
7. Throw in the chopped walnuts once you are happy with the batter or top them onto the batter once you have poured it into the oiled baking tray
8. Bake the cupcakes for around 25 to 30 minutes. Be sure to test if they are ready with a tooth pick or fork before taking them out of the oven

Delicious walnut chocolate cupcakes are now ready to be devoured with tea or coffee and perhaps a good book to keep you company on those long winter nights. If you would like some more inspiration with some recipes and healthy foods, I recently was checking out ALOHA and saw that they have a variety of healthy recipes to make.

We hope you enjoyed this post and found it helpful because apparently..... “Winter is coming!”

How do you achieve that lasting summer glow in winter?

Love,
Fizzah and Sadaf  

Disclaimer: This is a personal blog edited by its owners and the opinions expressed here belong solely to its owner's. For questions and queries please email at thepoutpainter@gmail.com
Read More

Wednesday, 30 September 2015

Rimmel London Kate Moss Lasting Finish Lipsticks - Review and Swatches


Hey girls! Today I am going to be showing you my collection of Rimmel Kate Moss lasting finish lipsticks, three of which are from their matte collection and one from their regular line. I have had them for quite a while so I have tested them well enough to pen down my thoughts on them.

I have recently discovered that Rimmel is not a cruelty free brand since they started selling in China and animal testing is required there by the law. I personally never recommend such brands even though they are very popular among girls here like Revlon, CoverGirl, L’Oreal, Maybelline, NYC, Almay and Bourjois too unfortunately I just found out. However, this is just my personal opinion and what you buy is your choice.


Product Claims

Kate Moss Lasting Finish Matte Lipsticks
Be Iconic - Make the Ordinary Extraordinary Sumptuously Rich Matte Colour with a sublime comfort. Ruby Powder enriched formula. Intense velvet colour all day!

Kate Moss Lasting Finish Lipsticks
The 1st Lipstick collection created by Kate Moss High intensity colour for up to 8 hours. Formula infused with Black Diamonds, reflects light like never before. Captures all the flair, edge and timelessness of Kate’s unique look.


What Do I Think?

Packaging is quite important to me because I always keep lipsticks in my purse for touch-ups. The plastic does not feel cheap and the cap clicks in place securely. The slanted top with the logo on top makes it easier to spot for me. In my opinion a good lipstick should be pigmented, less prone to transferring, long lasting and comfortable to wear. Rimmel Kate Moss lasting finish lipsticks get an A grade in all these departments.

The matte ones (107, 110 and 111) remain intact on my lips even after 7-8 hours in all kinds of weather. If I have an oily meal only then does the product fade from the very center of my bottom lip. The regular shade is 05 and is predictably easier to budge after a meal but its lasting power is still pretty decent around 5-6 hours although it does transfer a bit more than the mattes. The formula of all the shades glides on easily and does not bleed which is essential to me. I don’t feel the need to use a lip liner underneath and they all go perfectly opaque in one swipe. The face swatches are the most accurate I feel.


Shade 05
This is what I would call the “good girl pink”. You know the one we grab every time we want people to think we are mature and sensible for example, in front of professionals, in-laws and "4pm guests". It has a nice amount of warmth to it so it won’t wash you want unless you fall in the chocolate or ebony category. It has a cream finish with a gentle shine.


Shade 107
This is a deep matte Marsala which is quite red but I feel this is more appropriate for evening looks although I have worn it during the day. It is universally flattering but not for the faint of heart.


Shade 110
This is an intense in-your-face coral with more orange than pink. It is very bright and spring-y. It looks beautiful on cool tones and even neutral skin tone but I am not sure how it would appear on warm toned ladies. It is best to swatch such colours before you buy them.


Shade 111 - Kiss of Life
This is the only shade with a proper name and I have been drooling over its online swatches for years. Kiss of Life is a stunning neutral red so coupled with its matte finish, it is a dream come true.


There are not that many shades in the matte range but there are a lot of choices in the regular collection to suit a wide range of skin tones. I know most women think a lipstick should not cost more than PKR 100 but I prefer not to have lead in my lipsticks so I think these offer a good bargain given the quality.

Price

PKR 799 for 4.0g

Availability

You may buy this from your local Rimmel kiosk in all major cities

Pros

Great pigmentation
Lasts quite well
Creamy formula
Sturdy packaging
Affordable
Easily available

Cons

Test on animals when required by law as they sell in China as well.

My Rating

4/5

Have you got any of the shades from the Rimmel Kate Moss collection?

Love,
Sadaf


Disclaimer: This is a personal blog edited by its owners and the opinions expressed here belong solely to its owner's. For questions and queries please email at thepoutpainter@gmail.com
Read More

© Fizzah Iqbal, AllRightsReserved.

Designed by ScreenWritersArena