Professional Makeup Artist | Organic Chemist | Educator

Sunday 24 July 2016

How To: Sultry Eyes & Summer Lips


As soon as the mercury started rising we had lawn brands churning out volume after volume of catalogues with models clad in vibrant hues posing deliberately in the ways we are all too familiar with now. Lawn craze is nothing new in Pakistan but what I pay attention to the most is the models’ makeup. I always admire how the makeup artist is able to blend all the colours together to match anything the model wears.

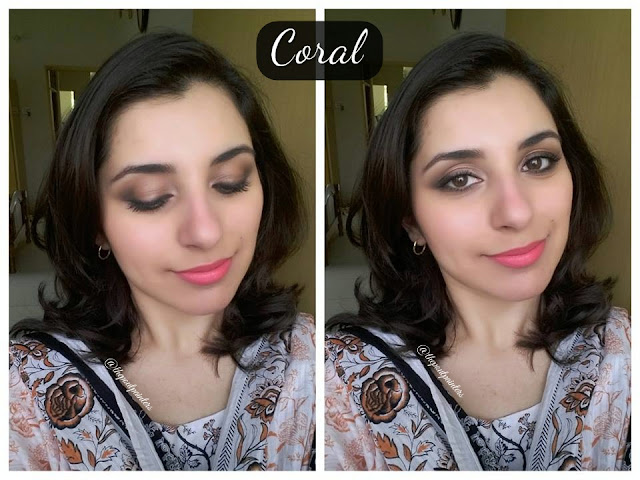
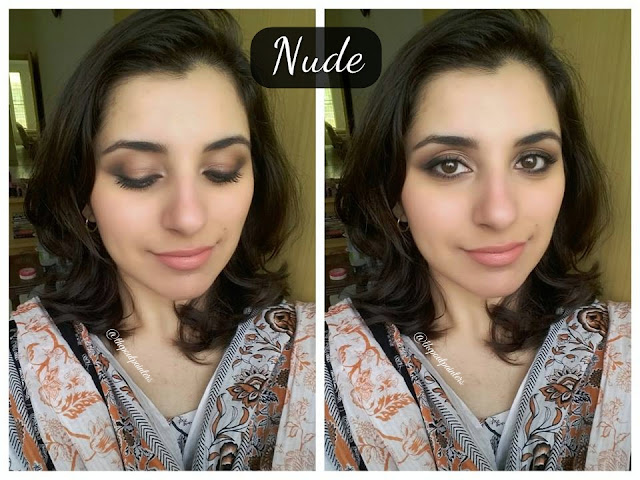
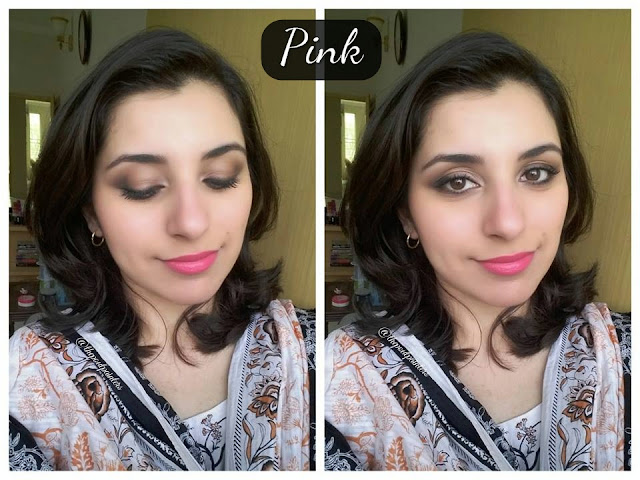
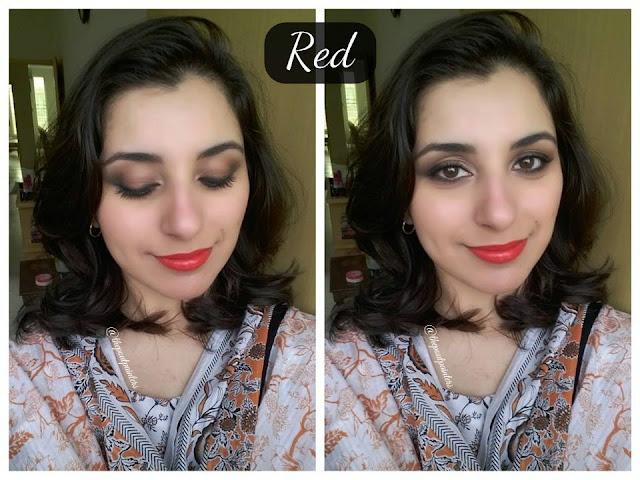
So, today’s tutorial is inspired by a trend I noticed recently in lawn catalogs: Sultry side smoked shimmery neutral eyes paired with bright summer-y lips. I will be showing you same eyes and complexion with a variety of summer appropriate lip choices to showcase its versatility and give you some ideas. 

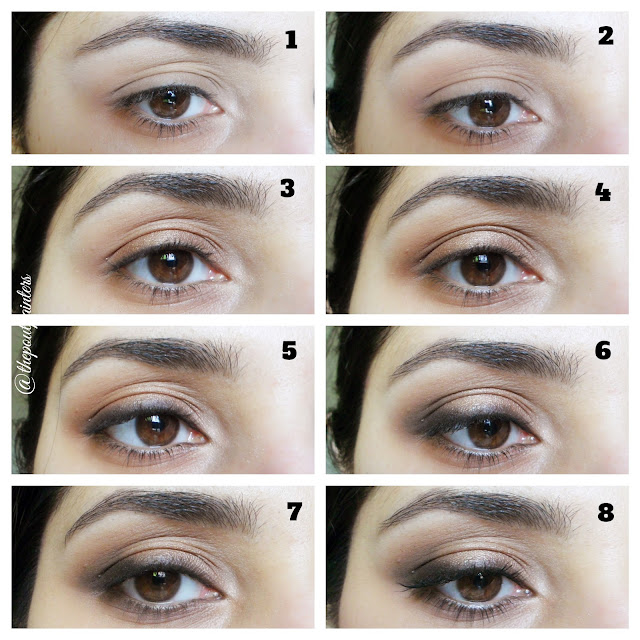
Step By Step Tutorial

For face framing brows I filled mine in with Anastasia Beverly Hills Dipbrow Pomade-Ash Brown. I had already primed my eyes with Makeup Revolution Fix and Focus Eye Primer-Matte, which is a decent enough drugstore option, and set it with Catrice Prime and Fine Translucent Loose Powder, which is now discontinued but remains a staple for me. I used Makeup Revolution I <3 Makeup Naked Chocolate palette, which an excellent affordable mix of neutral mattes and shimmers.

The Eyes

how to smokey eyes

Step 1
I recommend applying a matte cream shade (Smoothly) to the inner corner and brow bone first with a shader brush (Sigma shader E57). Your transition shade will blend into it seamlessly and if you wish add a shimmer to the inner corner later you will have a solid matte base to make it pop.


Step 2
Blend a matte milky brown transition shade (Tob-le-rone) into your crease with a fluffy brush (Morphe MB23).


Step 3
Pat on a caramel brown shimmer (Frosted Choc) to your mobile lid with a firm shader brush (Sigma shader E57).


Step 4
Apply a warm matte dark brown (Sweet Shop) to your crease with the fluffy blender in Step 2 (Morphe MB23).


Step 5
Smudge a black kohl pencil (Luscious Onyx) as close your upper lash line as possible.


Step 6
Blend a dark matte brown (White) into your outer corner and slightly into your crease while joining it with the smudged liner and softening it with a round blending brush (DMGM Eye Smudge).


Step 7
Using a pencil brush (Sigma Pencil E30) define your lower lash line with the crease colour in Step 4 (Sweet Shop).


Step 8
Tightline (Luscious Onyx) and liberally apply mascara (Essence I Love Long Lashes Mascara) from root to tip.

The Face

Clean up under your eye with a wipe and spot conceal (Oriflame Rosemary and Tea Tree Oil Purifying Corrective Stick). Apply the foundation of your choice. I mixed Luscious HD Mineral Foundation-Ivory with Garnier BB cream-Light to get my perfect shade while keeping things light and dewy. I then set my entire face with Catrice Prime and Fine Translucent Loose Powder. A sweep of bronzer (Makeup Revolution Ultrabronze) across the high points of my face along with Colorstudio Pro Blush-Pixie Pink blended backwards from my apples was just enough to complement my bright lips.

Full face tutorial


Lips

Nude: Colorstudio Pro Color Rush Lipstick - Desire
Orange: Flormar Super Shine lipstick 502

Smokey eyes dark lips

Smokey eyes bright lips

Smokey eyes purple lips

Smokey eyes nude lips

Orange lips

Smokey eyes pink lips

Smokey eyes red lips

Predictably, I liked the mauve combo best. This is a great way to flaunt your favourite summer pout with the lawn suit you achieved after many a fight with your tailor and of course lawn wars at the store.

Which lip colour do you love best for this season?

Love,
Sadaf

Disclaimer: This is a personal blog edited by its owners and the opinions expressed here belong solely to its owner's. For questions and queries please email at thepoutpainter@gmail.com
Read More

Monday 4 July 2016

How To - Define a Hooded Eye Crease

Hooded Eye Tutorial

Hey guys! Today I am going to tackle the question I get answered the most. A lot of people with hooded eyes feel at a disadvantage because they don’t have a lot of lid space and their crease is not naturally deep. That’s understandable since most of the looks we see on Instagram feature models with doe eyes, sharp crease and large lid space. The drag techniques so popular these days like huge winged liner, severe creases, lid focused looks, giant falsies cannot be applied to hooded eyes for the most part. So when a person with hooded eyes fails to recreate them they are disappointed.

First of all, every eye shape is beautiful and has its own unique advantages. Hooded eyed beauties can flaunt their crease unlike any other. Some of the most gorgeous and famous international celebrities have hooded eyes and they rock their natural features confidently. Anyone know Gigi Hadid, Blake Lively, Jennifer Lawrence, Selena Gomez, Taylor Swift, Catherine Zeta Jones, Emma Stone or Rachel McAdams? Makeup is about definition not changing your features. This is the no.1 mistake hooded eyed ladies make. 

I have partially hooded eyes with uneven hoods and a prominent hood on days when I am tired or my eyes are swollen for some reason. Follow the steps below to respect your natural shape and bring out your eyes.


Step by Step Tutorial

I used BH Cosmetics 120 shade 5th edition palette and their Carli Bybel palette one for the golden lid shade. In the video, I applied a light warm matte brown as the transition colour unlike the pictorial. Its purpose is to show you placement and blending.

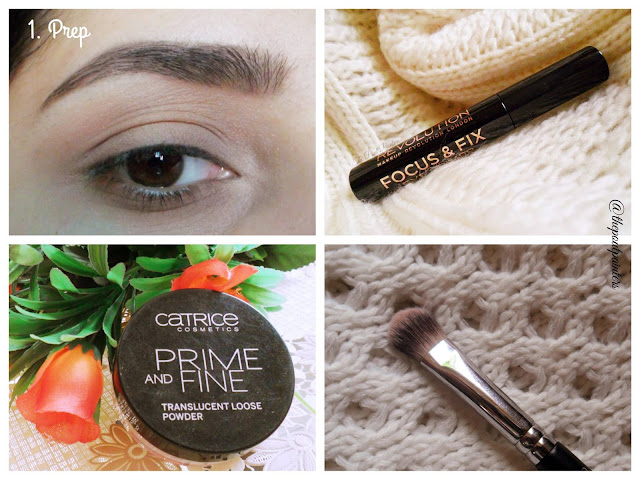
Step 1: Prep Your Eyes
You can’t blame the shadow then you skip eye primer or any sort of base (Makeup Revolution Focus and Fix eye primer-Matte) and don’t lock it in with a mattifying powder (Catrice Prime and Fine translucent powder).

Prepare Eyes Makeup Revolution Primer Catrice Powder

Step 2: Transition
You need a shade that your actual crease colour may blend into preferably be matte. I used a slightly shimmery one here because I don’t own a matte like this and I really wanted to show you how a warm tan, mustard, orange can bring out amazing contrast. You will need a big fluffy brush like Morphe MB23

Tutorial Hooded Eyes Morphe MB23

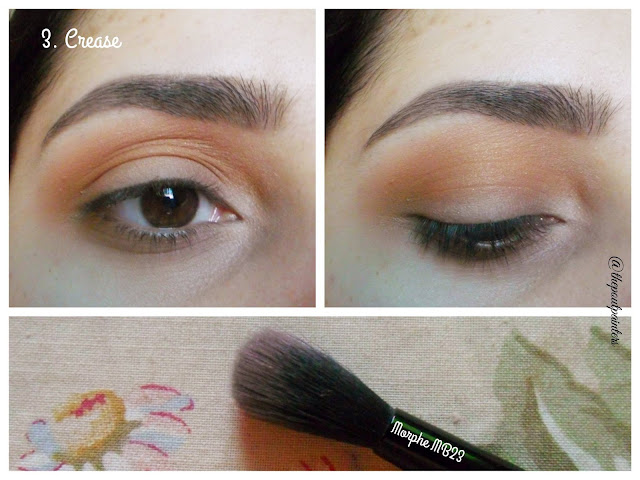
Step 3: Crease 
Place this right into the socket with a fluffy brush (pointed ones can be very painful) so it blends into your transition but sits below it and above the lid. I used a warm matte medium brown.

Hooded Eyes Tutorial Morphe MB23

Step 4: Deepen Crease
I don’t usually use black but I know most people don’t think drama can be achieved without black. Here I used a matte black in the outer crease only (not the outer corner of the lid!) using DMGM Eye Smudge brush, which is dome shaped but not s narrow.  Remember to gently blend it with a fluffy brush to avoid looking harsh. 

Tutorial Hooded Eyes DMGM Eye Smudge

Step 5: Lid Shading
Look straight in the mirror to find your mobile lid. Your lid colour cannot go outside this zone. Shimmer in the crease will destroy the hard work you just did to make your crease recede. Pat it on gently with a lid brush like Colorstudio Pro shader.

Hooded Eyes Tutorial Colorstudio Pro shader brush

Step 6: Lower Lash Line
Blend the transition and crease shades in the lower lash line to create a similar gradient effect with any brush you prefer.

Hooded Eyes Tutorial DMGM Eye Smudge

Apply mascara and tightline. You can add some highlight to the inner corner and brow bone as you wish. I paired these eyes with Colourpop Ultramatte lip in Clueless and Makeup Revolution powder blush in Now.

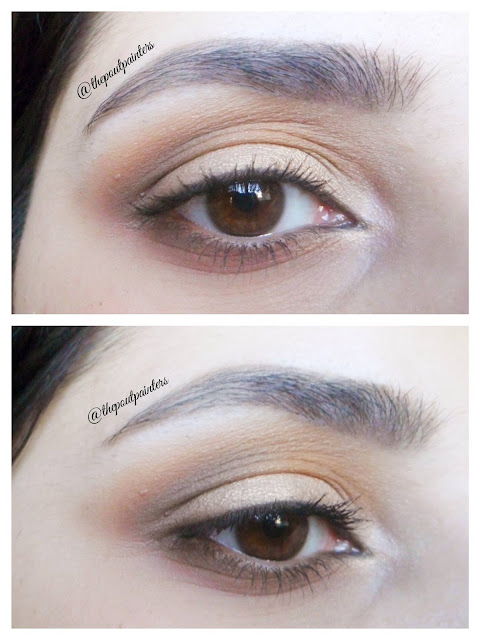
Hooded Eyes Basic Tutorial

Tutorial for Hooded Eyes


How do you prefer to define a hooded crease?

Love,
Sadaf

Disclaimer: This is a personal blog edited by its owners and the opinions expressed here belong solely to its owner's. For questions and queries please email at thepoutpainter@gmail.com
Read More

© Fizzah Iqbal, AllRightsReserved.

Designed by ScreenWritersArena